
How Much Space Do You Need for a Home Gym? A Complete Guide
You might think a home gym needs a whole spare room, but most effective setups fit in just 80–120 sq ft when you plan wisely. By breaking the area into clear cardio, strength, and stretching zones and keeping at least two feet of clearance around each piece, you’ll avoid crowding and stay safe. The key is to choose compact, multi‑functional equipment and consider ceiling height and flooring early on. This systematic approach lets you maximize every inch and still have room for future upgrades.
Why Knowing Your Home‑Gym Space Matters Before You Buy?
Because you know the exact dimensions of your home‑gym area before you start buying equipment, you can avoid costly mismatches and safety hazards. Measure length, width, and ceiling height, then sketch a scale diagram. Identify zones for cardio, strength, and stretching, leaving at least 2‑foot clearance around each station.
Prioritize space efficiency by selecting compact, multi‑functional gear—foldable benches, adjustable dumbbells, and wall‑mounted racks. Evaluate equipment versatility: a single piece should support several exercises, reducing the total footprint while expanding workout variety.
Verify that power outlets, ventilation, and lighting fit within the layout. By confirming these details upfront, you preserve freedom to move, train, and expand without reconfiguring or compromising safety.
How Many Square Feet Do You Really Need for a Basic Home Gym?
You’ll first map each piece of essential equipment to its footprint, then add the clearance needed for safe movement and loading.
Next, calculate the total square footage by summing equipment footprints and clearance zones.
Finally, arrange the layout to maximize efficiency, keeping high‑use items within easy reach while preserving the required clearance.
Essential Equipment Footprint
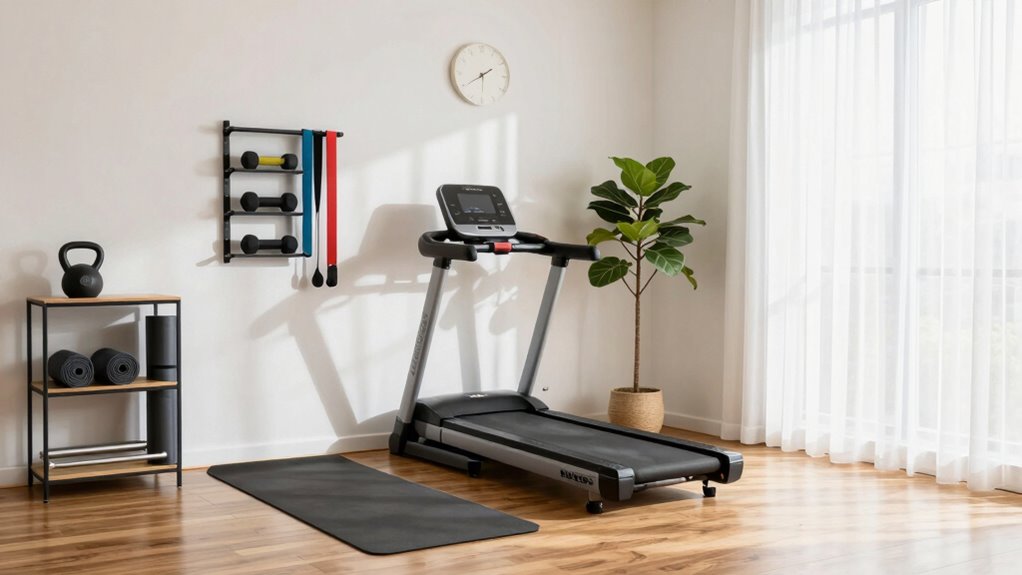
A typical basic home gym can fit comfortably in 80–120 sq ft, enough space for a compact treadmill, a set of adjustable dumbbells, a fold‑down bench, and a small rack for a barbell and plates.
First, measure each piece’s equipment dimensions; a treadmill typically occupies 6 × 2 ft, a bench 4 × 2 ft, and a rack 3 × 2 ft.
Next, draw a floor plan on graph paper or a digital app, placing larger items against walls to free central area.
Use space optimization by stacking plates, nesting dumbbells, and selecting a bench that folds flat.
Keep a clear 2‑ft aisle between stations for movement, and store cords or accessories in a wall‑mounted rack.
This systematic layout maximizes freedom while staying within your square‑foot budget.
Minimum Clearance Requirements
Even if you only have a modest room, you still need enough clearance to move safely and perform exercises without hitting walls or equipment.
Calculate a practical footprint by measuring the area around each piece, then add a buffer for dynamic movements. Aim for at least 3 feet of open space in front of cardio machines and 2 feet on each side of free-weight stations.
Keep the ceiling height at a minimum height of 8 feet to accommodate overhead lifts and jump work. Efficient space utilization means arranging equipment in zones, preserving clear pathways, and avoiding clutter that could restrict motion.
- 3 ft front clearance for treadmills or bikes
- 2 ft side clearance for dumbbell racks
- 8 ft minimum height for pull-up bars and kettlebell swings
- 4 ft aisle width for circuit flow
Optimal Layout Strategies
Around 150 sq ft is enough for a functional basic gym if you zone equipment wisely.
Start by mapping a rectangular zone for each activity: cardio, strength, and stretching. Allocate 4‑5 ft around a treadmill for safe entry and exit, then place a compact rack or dumbbell set opposite the wall, leaving a 2-ft clearance for movement.
Use a fold-down bench that tucks against the perimeter when not in use, preserving floor space. Arrange yoga mats and resistance bands in a corner that naturally flows from the strength zone, ensuring you never cross paths.
This space optimization creates a clear layout flow, lets you shift between exercises without bottlenecks, and maintains the feeling of openness you crave.
Which Home‑Gym Equipment Types Need the Most Floor Space?
Which home‑gym gear demands the most floor space? You’ll find that bulky, multi‑directional machines dominate the layout, so you must assess space efficiency and equipment prioritization early.
Measure clearances, plan traffic flow, and allocate zones before buying.
Measure clearances, plan traffic flow, and allocate zones before buying.
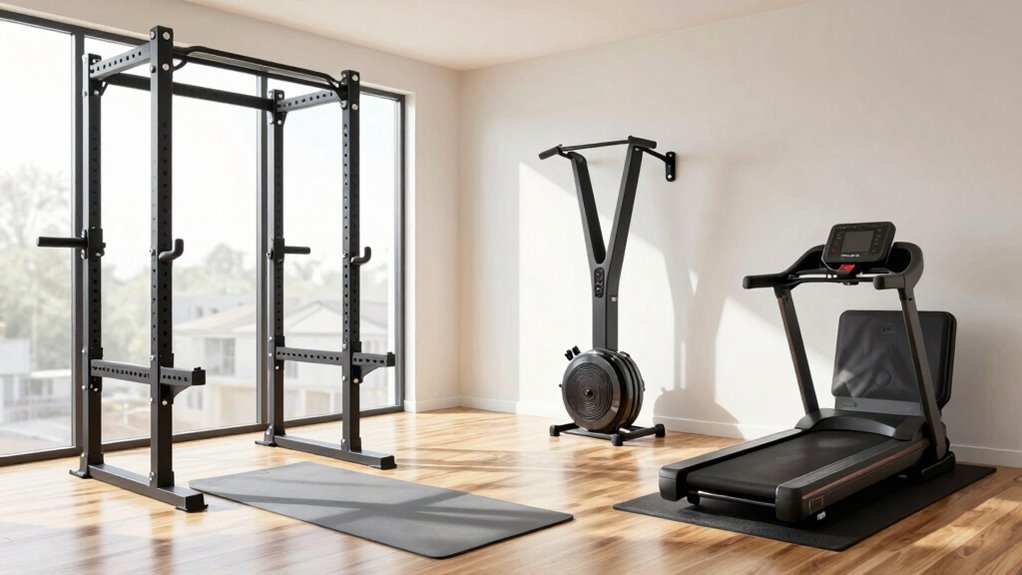
- Power racks with pull‑up bars – require a 4‑ft by 4‑ft footprint plus clearance for barbell swings.
- Adjustable benches – need a 3‑ft by 2‑ft area and room for leg extensions.
- Cable stations – occupy a 5‑ft by 3‑ft rectangle and need space for pole extension.
- Rowing machines – need a 3‑ft by 2‑ft zone and a few extra feet for entry and exit.
How Should I Size My Strength‑Training vs. Cardio Area?
You’ll allocate space by first measuring each strength‑equipment footprint, then adding a safety buffer for movement and loading.
Next, calculate the clearance needed around cardio machines, accounting for user stride and ventilation.
Finally, compare the two totals to balance the layout and guarantee neither zone feels cramped.
Strength Equipment Footprint
A typical home gym needs roughly 150–200 sq ft for strength equipment, leaving about 50 sq ft for cardio machines to keep the layout functional and safe.
When you choose strength equipment types, measure each piece’s footprint, then add a 2-ft clearance zone for safe movement.
Apply space optimization by clustering items that share a motion path, like a squat rack next to a bench.
Keep the floor plan modular so you can reconfigure as your routine evolves, preserving the freedom to expand or shrink zones without sacrificing safety.
- Power rack with 4-ft clearance on all sides
- Adjustable bench requiring 2-ft depth
- Dumbbell rack occupying 3-ft by 2-ft footprint
- Cable machine needing 3-ft by 2-ft space plus 2-ft clearance around the pulley path
Cardio Machine Clearance
After measuring the strength‑equipment footprint and adding the required 2‑ft clearance zones, you can allocate the remaining floor area to cardio machines.
First, list the cardio machine types you want—treadmill, elliptical, bike, or rowing unit—and note each model’s depth and width.
Then, apply a 3‑ft buffer in front for safe stepping and a 2‑ft side aisle for ventilation.
If space is tight, choose fold‑up treadmills or compact spin bikes, and place a wall‑mounted treadmill that slides under a desk when not in use.
Use space‑saving tips like stacking a fold‑away step platform against a wall and storing resistance bands in a nearby rack.
This systematic layout guarantees freedom of movement while maximizing functional area.
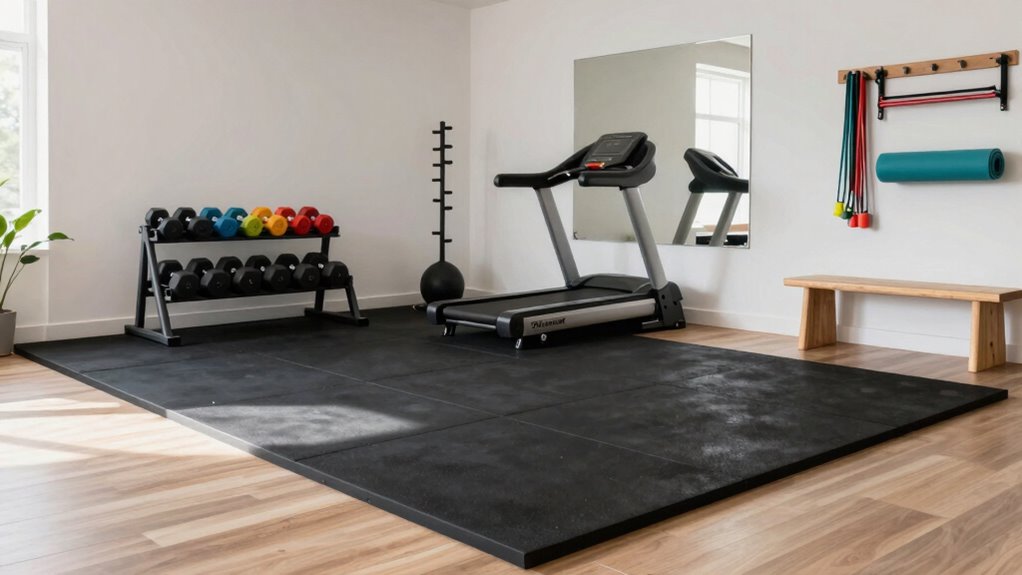
What Layout Tricks Keep You Safe in Tight Spaces?
When space is limited, start by mapping every piece of equipment onto a floor plan that marks clear zones for movement, storage, and safety.
Use space saving techniques like folding benches and wall‑mounted racks, and keep your equipment arrangement tight but breathable.
Prioritize a 3‑foot clearance around each machine, and align cardio units perpendicular to weight stations to avoid cross‑traffic.
Mark floor tiles with colored tape to visualize walkways and emergency exits.
- Position heavy gear near a wall for stability and easy access.
- Use modular mats that lock together, defining a safe workout island.
- Store cords and accessories in overhead bins to keep floor space clear.
- Install mirrors on one side to monitor form without crowding the area.
How Do Ceiling Height & Flooring Impact Your Home Gym?
Mapping your equipment into a clear floor plan already shows you where space is tight; now consider how ceiling height and floor material shape those zones.
Ceiling considerations dictate which movements fit—higher ceilings accommodate jump‑training and overhead lifts, while lower ceilings limit them and require compact equipment.
Choose flooring materials that absorb impact, protect subfloor, and aid air circulation; rubber mats, cork, or foam each affect grip and moisture.
Lighting options should complement ceiling height, using recessed or track lights to avoid shadows and enhance visibility.
Soundproof solutions—acoustic panels or dense flooring—contain noise and improve focus.
Finally, aesthetic choices like color, texture, and wall art reinforce a spacious feel, turning constraints into a motivating environment.
How to Future‑Proof Your Home Gym Layout?
If you anticipate adding new equipment or changing training styles, design your gym with modular zones and clear circulation pathways now.
Start by mapping out zoning areas that separate cardio, strength, and mobility zones, leaving room for future modular equipment. Keep floor‑to‑ceiling clearance generous, and use removable dividers to reconfigure spaces quickly.
Plan power outlets and wall mounts in central locations so upgrades won’t require rewiring.
- Install floor‑mounted rails that accept interchangeable accessories.
- Use adjustable-height platforms for both squat racks and plyometric work.
- Choose wall‑mounted racks with sliding panels for easy expansion.
- Design a flexible lighting grid that can be repositioned as zones evolve.
These steps give you freedom to adapt, grow, and stay current without costly remodels.
How to Test Your Home‑Gym Design Before Building?
Ever wondered whether your layout will actually work once you start training? Start by sketching design prototypes on graph paper or a digital planner. Then run virtual simulations to spot clearance issues, equipment reach, and flow bottlenecks. Test each movement—squat, deadlift, cardio—by walking the imagined path; note any cramped zones. Adjust dimensions, then repeat the simulation until the space feels open yet efficient.
| Step | Action |
|---|---|
| 1 | Draft rough floor plan |
| 2 | Import into 3‑D simulation tool |
| 3 | Run movement checks and iterate |
Follow this systematic loop, and you’ll validate your gym’s freedom before any brick is laid.
Frequently Asked Questions
Can I Install a Home Gym in a Basement With Low Ceilings?
Sure—you can fit a basement gym despite low ceilings by mastering space optimization and smart equipment selection; choose compact, multi‑functional gear, mount racks low, and keep movement zones clear for freedom.
Do I Need Special Ventilation for Cardio Equipment?
Yes, you need proper ventilation for cardio gear. Use mechanical ventilation types like exhaust fans or HVAC to maintain air quality, ensuring fresh oxygen flow and removing heat and moisture efficiently.
How Much Clearance Is Required for Weight Plates on the Floor?
Honestly, you’ll need at least two feet of clearance around each plate for weight‑plate safety and floor space, ensuring you can lift, rack, and move without bumping anything.
Can I Combine a Home Gym With a Home Office in the Same Room?
Yes, you can merge them by applying space optimization and using multi‑functional furniture—like a desk that folds into a squat rack or a bench that doubles as a work surface—maintaining clear zones for each activity.
Will a Sloped Ceiling Affect the Placement of a Treadmill?
70 % of home-gym owners report ideal treadmill placement despite sloped ceilings. You’ll need to clear at least three feet of headroom, align the belt parallel to the slope’s lowest point, and secure the base to prevent wobble.